Step 1. Add Students
Step 1. Add Students
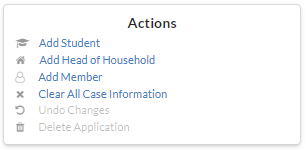
Student information is entered first, and can be entered by clicking the Add Student link in the Actions box or the Household Members grid.
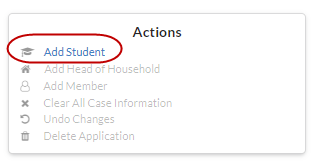
Or,

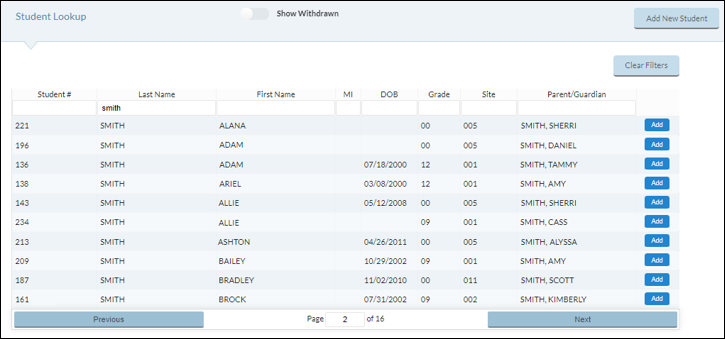
The Student Lookup form opens with a list of available Students.
FILTER BY
- You can filter students by Student #, Last Name, First Name, MI, DOB, Grade, Site or Parent/Guardian. Click the head of a column if you want to filter by that column’s category.
- You can also type in the text field at the top of each column to narrow the list results.
- Click the Clear Filters button to remove any filters from the student list.
- Click the Show Withdrawn toggle button to display Withdrawn Students in red.
There are two ways to add a student to an application: automatically with the Add button, and Manual entry.
- Click the
 button to Add that Student onto the application. The student’s information will display in the Student form (see below). Please review for accuracy/changes.
Or,
- Users can click the
 button to manually enter student information.
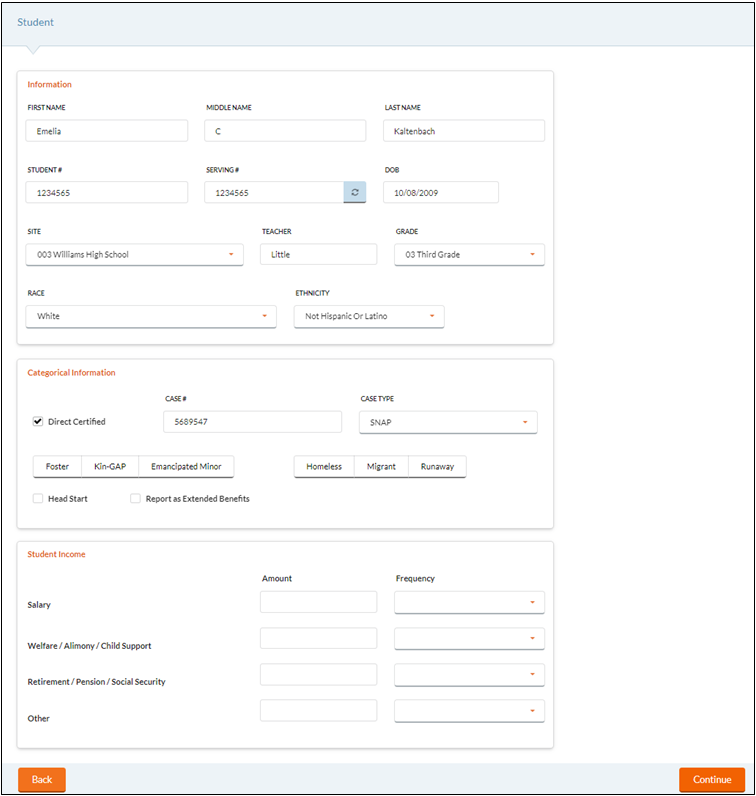
Student Information Form
INFORMATION
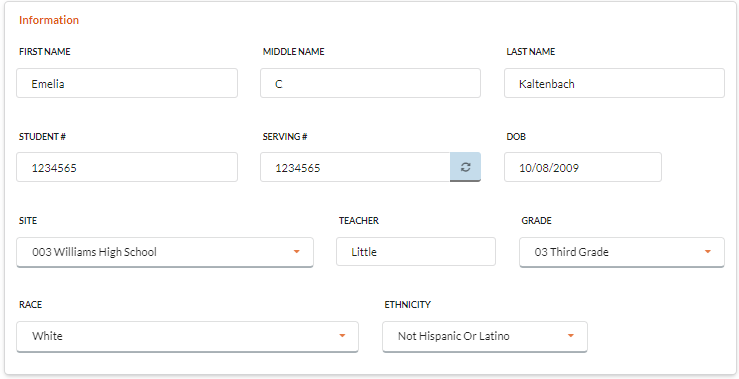
- Enter the student’s First, Middle and Last Names in the appropriate fields. Middle Name is optional.
- Enter a student number in the Student # field.
- Student # is the main ID number that is used to identify a student throughout Meals Plus Web. It is usually assigned by the school district or state agency. This is required for all students and must be unique. It must be numeric, and from three-12 digits.
- Duplicate student numbers are not allowed. If you enter a number that has already been used, you will get a message that tells you which student it is assigned to.
- Student # is the main ID number that is used to identify a student throughout Meals Plus Web. It is usually assigned by the school district or state agency. This is required for all students and must be unique. It must be numeric, and from three-12 digits.
- Enter a serving number in the Serving # field, or click the
 button to have Meals Plus Web generate a Serving #.
- The Serving # is an ID number that is used for serving this student in Serve: Point of Sale. (Since Student ID can be up to 12 digits, some schools prefer to use a different ID number for serving in the cafeteria.)
- If the student already exists in the database, it will default to the Serving # that already exists.
- You can enter any number here as long as it is not a duplicate of an existing Serving #.
 Using one student’s Student Number as another student’s Serving # is not recommended. You will get a warning message if this happens; you should select a different Serving # if possible.
- Enter the student’s birth date in the Birth Date/DOB field. This is optional.
- Select the student’s site from the Site dropdown list.
- Enter the student’s teacher name in the Teacher field. This is optional.
-
Select the student’s grade from the Grade dropdown list. This is optional.
-
Select the student’s Race and Ethnicity from the dropdown lists. if desired. They are optional.
-
If these fields are left blank, they default to No Response.
-
CATEGORICAL INFORMATION

- Check the Direct Certified box ONLY if the student you are entering is Direct Certified (based on information you received from the social services agency).
- If this is checked, the student will automatically be approved for free meals and the application will be exempt from Verification.
- When students are added to a Direct Certified application, all students in the household will automatically display on the new application.
- If Direct Certified is selected, Foster, Kin-GAP or Case Type must be selected.
- If this student receives SNAP (Food Stamps), FDPIR or TANF, enter the case number in the Case # field. If they do not receive SNAP, FDPIR or TANF, leave this blank.
- You will get a message if the case number has already been used on another application, but duplicates are permitted.
- If the case number applies to all the students in the family, you need to enter it again for each additional student.
-
 Any student with a case number is categorically eligible and will be automatically approved for free meals.
- Select Other, Medicaid, TANF, SNAP, or FDPIR from the Case Type dropdown list. This assigns a case type to an application when creating letters and reports.
- Medicaid Reduced case type applications must also have the Direct Certified checkbox checked. A message will appear if a reduced case type is selected and the Direct Certified checkbox is not checked.
- Case Type extends to all types, except for the ‘exceptions.’
- Exceptions include: Foster, Kin-GAP, H/M/R and Head Start.
- Case Type is used in reports and Verification counts.
- Medicaid Reduced (Medicaid Demonstration participants) case type applications will not be included in verification counts.
- Select Foster, Kin-Gap, or Emancipated Minor, if applicable.
- Select Foster ONLY if this student is a foster child.
- Foster children are automatically approved for free meals.
- Select Kin-GAP ONLY if the student qualifies for the Kinship Guardianship Assistance Payment Program.
- Select Emancipated Minor ONLY if the student is an emancipated minor who is legally allowed to submit his or her own application.
- The emancipated minor will be listed as both the Head of Household and as a Student. The family size will be adjusted because of this.

- If the student has income, however, it will need to be entered on the Student form.
- Select Foster ONLY if this student is a foster child.
- Select an option from the Homeless, Migrant, or Runaway ONLY if the student is a homeless, migrant, or runaway child.
- Check the Head Start box if the student is enrolled in Head Start.
- Head Start students are automatically approved for free meals.
- Check the Report as Extended Benefits box to display the student on the Extended Benefits Report. It will not affect their Categorical or DC status.
- Benefits will be extended automatically to all eligible students in the household with exceptions to H/M/R, Head Start and Foster/KinGap students.NOTE: When a new application is added, the student that is selected when a Case Type added is not marked as Extended Benefits; other students on the application with no Case Type are 'Extended'.
- There can be multiple case numbers within one application, and students with their own Case #/Type are not 'Extended'.
- If an eligible student is added without a Case #/Type, it will be marked as 'Extended' based on the existing student's Case #/Type.
- If an exception (H/M/R, Head Start, etc.) is added without a Case #, it will not be 'Extended'.
- Benefits will be extended automatically to all eligible students in the household with exceptions to H/M/R, Head Start and Foster/KinGap students.NOTE: When a new application is added, the student that is selected when a Case Type added is not marked as Extended Benefits; other students on the application with no Case Type are 'Extended'.
STUDENT INCOME
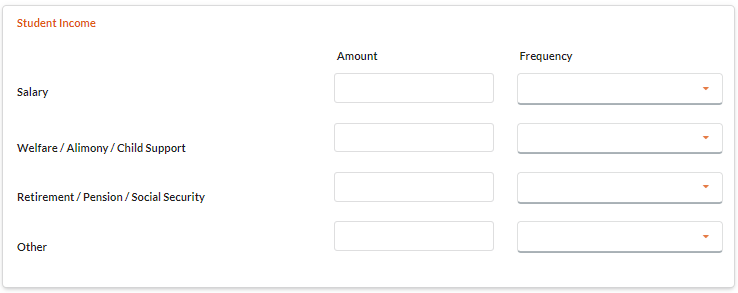
- If the Student has income, enter the Amount and Frequency in the Student Income for Salary, Welfare / Alimony / Child Support, Retirement / Pension / Social Security and Other fields.
- You will enter the adults’ income on the Head of Household and Member forms.
- Click
 . The Student will display in the Household Member grid on the Application Hub. NOTE: Students will display with an icon to notate that they are students.
- Continue to add students until all the students in the household are listed.

- When all students and their personal income have been entered, click Add Head of Household in the Actions box to add Head of Household information.
